E-Mail Event Maintenance While in E-Mail Master Maintenance, you can click a View link to display e-mail events corresponding to the Event row. Note: Implementation Guide: QAD Customer Self Service contains a full list of the events that can trigger an e-mail. Viewing E-mail Event Details Through E-Mail Master Maintenance Clicking a View link displays the screen in E-Mail Event Maintenance. E-Mail Event Maintenance 
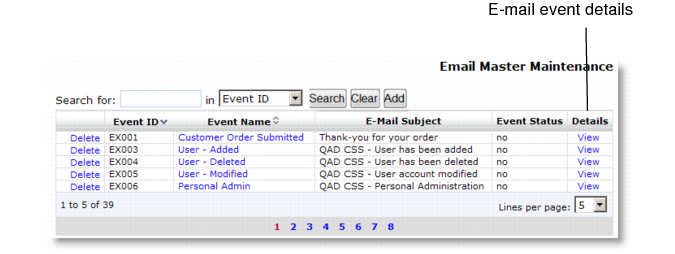
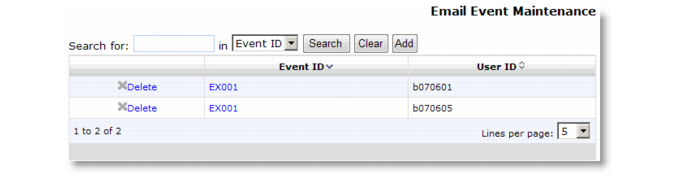
E-Mail Event Maintenance Navigation summarizes the contents of the E-Mail Event Maintenance navigation screen. E-Mail Event Maintenance Navigation Column Search Search Type Sort Description Link Event ID Y Equals Y Unique identifier of the e-mail event. Y User ID Y Equals Y User associated with this event. N Adding an E-Mail Event Entry The Add function of E-Mail Event Maintenance lets an administrator add custom e-mail event documents and associate them with specific QAD CSS pages. To create a new entry: 1 Click Add in the navigation window to display the edit screen in Add mode. 2 Enter data into the appropriate fields. 3 Click Add in the edit window to save the record. Detail Edit E-Mail Event Event ID Enter an existing identifier for an e-mail event. This field can be browsed to locate valid entries. Browse icon This icon brings up an e-mail event master window that lets users select from a list of all existing e-mail events. User ID Unique identifier for a QAD CSS user. This field can be browsed to locate valid entries. Browse icon This icon brings up a browse master window that lets users select from a list of all valid QAD CSS user IDs. Clicking a command button executes one of the following actions: • Add saves the new record to the database. All required fields—indicated by alternate field color—must be populated prior to saving a record. Before saving, the system verifies that the record is unique and displays an error if it is not. • Cancel closes the window without adding the record. Modifying an E-Mail Event Entry The Modify function of E-Mail Event Maintenance lets an administrator modify existing e-mail event entries. Requirements for adding a record are the same as for editing a record. To modify an entry: 1 Display the record to modify. 2 Click the Event ID link in the row of the record to be modified. Clicking the link displays the edit screen. 3 Enter data into the appropriate fields. Fields that do not allow change are indicated by a second alternate color. 4 Click Save to commit the changes.